Tuesday, September 1, 2015
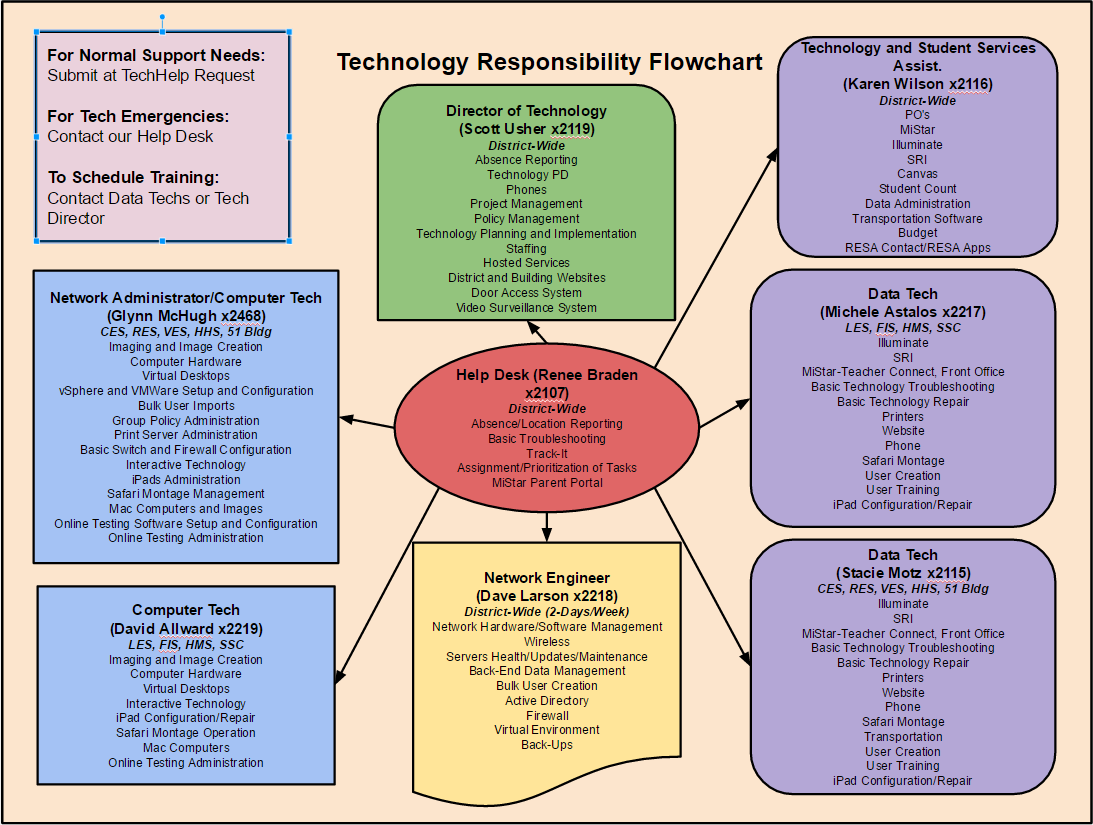
Technology Responsibility Flowchart
A number of folks have indicated an interest in having me resend the Technology Responsibility Flowchart. Below you will find that chart. To see the flowchart full size, please click on the link below it.
VDI Access from Outside the District
We have 50 basic “Staff” Virtual Desktops set up so teachers can have access to district network resources from outside the district. To login to a VDI Machine, follow the instructions below.
- Open the web browser of your choice from a computer connected to the Internet. The faster the Internet connection the better.
- Browse to https://mypc.hartlandschools.us/.
- From here you will have two choices, Install VMWare Horizon View Client or VMWare Horizon View HTML Access.
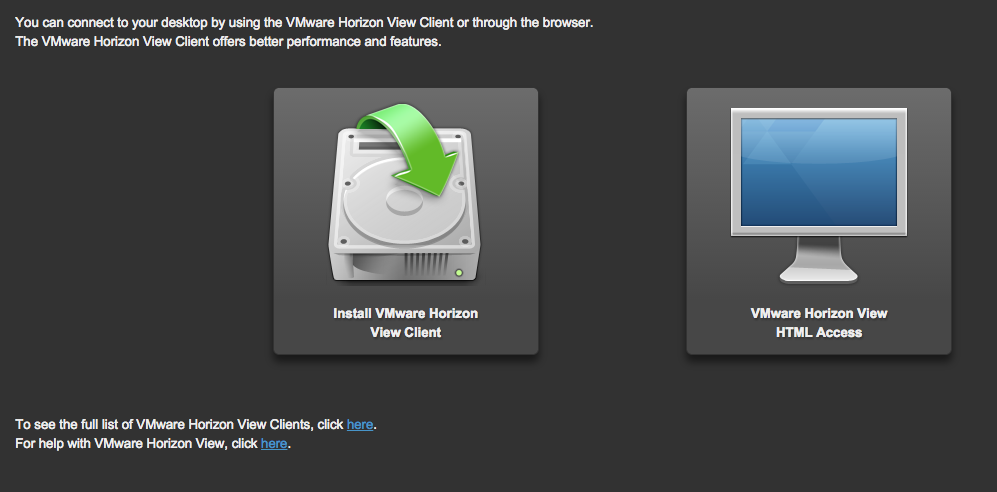
- Select “Install VMWare Horizon View Client” if you would like to download and install a client that will run on your Windows or Mac desktop. (This option often provides better performance of your virtual machine (VM). However, it is not necessary if you just want to run the VM through your browser. If you don't plan to do this all that often, then browser (HTML) access will probably suit you just fine.
- Select “VMWare Horizon View HTML Access” if you wish to run a “Staff” desktop through your web browser.
Installing and Running the Client
- Click on “Install VMWare Horizon View Client.
- Select the appropriate “go to downloads” link consistent with your computer where you are setting up the client. (Please only do this on a private device. Do not try to install on a public device where others will have access to the client after you leave such as a library).
- And yes, as you can see you can even install the horizon view client for iOS or Android.

- However, for your home computer, choose either the Mac link or one of the two Windows links. You will need to know if you have a 32-bit or 64-bit install of your windows operating system though.
- Click on the “Go to Downloads” link of your choice.
- Review your selection in the window that comes up and click the “Download” button.

- Once the file is downloaded, double click the icon and follow the onscreen instructions.
- Launch the client once the install completes.
- Click on the “New Server” icon to configure our virtual server

- When prompted to “Enter the name of the Connection Server” enter the following: mypc.hartlandschools.us
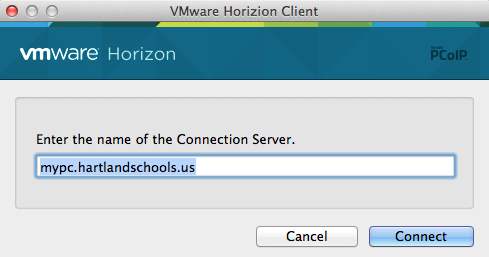
- Click the “Connect” button.
- If prompted type your UserID and Password (the same one you use to log into the computer at school every day.
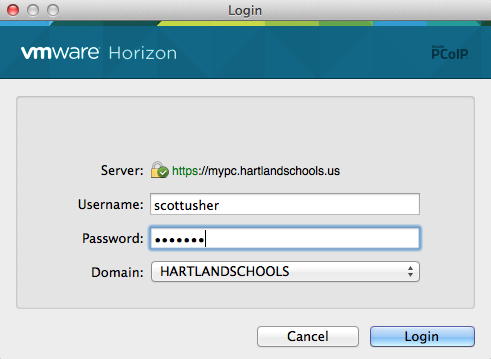
- Click “Login”
- You will then be launched into the “Staff” Windows 7 Desktop with all your drive mappings to the “H” drive and Shared drives set up for you.
This is a generic Staff Desktop with some of the basic applications we believe you may be wanting to use from offsite. Remember this is a VM running through your Internet connection at home. It has limitations but provides you access to many district resources.
Running Your VM Through Your Browser
- Click on the “VMWare Horizon View HTML Access icon.
- Enter your Username and Password. The same Username and Password you use to log on to your computer at school each day.

- Click “Log In”.
- You will have to click on the “Staff” VM (Virtual Machine) icon.
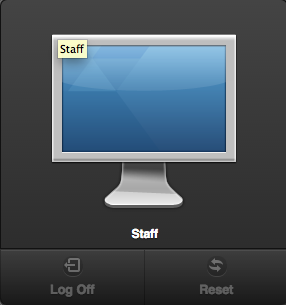
- This will launch your VM within your web browser and allow you to use the same applications and access the same drive locations as downloading and launching the client.
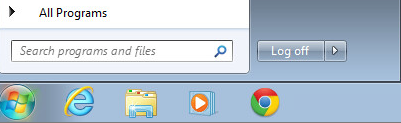
* When you are through using your VM from either the desktop or web client, please be sure to Log Out of your Windows 7 VM.
** If using the web client, also be sure to log out of mypc.hartlandschools.us by clicking on the “Log Out” button in the upper right corner.
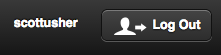
From here you can close your browser window.
Wednesday, August 26, 2015
Passwords and Security
We all have busy lives and tend to overlook certain things. One of the things we should really be more careful about not overlooking in both our personal as well as professional lives is electronic security. I cannot tell you the number of times I have been asked to work on someone's computer, have asked them for their password and quickly learn it is still the default password the Tech Department gave them 3 years prior.
All too many times I have also heard the phrase "Oh I use that password for everything". I stop just short of following that up with the question, "Even your banking passwords?" because I don't even want to know the answer.
Best practices and your Hartland Technology Department recommendation indicates you should have to access your computer by using a protected (login/password) and you should have separate passwords for every online account you make. Strong passwords should be a mix of alpha, numeric, and capital letters such as 53np8R7T8 to make it as hard as possible for anyone to break.

Still skeptical?
Look at it this way, if another person happens to gain access to your password that you use to log into your computer and all your passwords are the same, that student will have a much easier time gaining access to your school email, MiStar, Illuminate, banking, credit card, retirement, etc. accounts. Sure the UserID's may not be the same, but in most cases they are comprised of your name and much easier to guess than your passwords.
All that being said, don't make things so complex that you forget your passwords. To help you, you can use a password keeper such as the free LastPass password keeper (https://lastpass.com/) or another one of your choosing. LastPass allows you to maintain all your passwords in one database while ONLY needing to remember the one password that allows you to gain access to your password database.

It's the beginning of a new school year and therefore an excellent time to consider shoring up your personal and professional electronic security and changing those tired old electronic passwords.
All too many times I have also heard the phrase "Oh I use that password for everything". I stop just short of following that up with the question, "Even your banking passwords?" because I don't even want to know the answer.
Best practices and your Hartland Technology Department recommendation indicates you should have to access your computer by using a protected (login/password) and you should have separate passwords for every online account you make. Strong passwords should be a mix of alpha, numeric, and capital letters such as 53np8R7T8 to make it as hard as possible for anyone to break.

Still skeptical?
Look at it this way, if another person happens to gain access to your password that you use to log into your computer and all your passwords are the same, that student will have a much easier time gaining access to your school email, MiStar, Illuminate, banking, credit card, retirement, etc. accounts. Sure the UserID's may not be the same, but in most cases they are comprised of your name and much easier to guess than your passwords.
All that being said, don't make things so complex that you forget your passwords. To help you, you can use a password keeper such as the free LastPass password keeper (https://lastpass.com/) or another one of your choosing. LastPass allows you to maintain all your passwords in one database while ONLY needing to remember the one password that allows you to gain access to your password database.
If you are interested, check out this YouTube video to help you get started.
Monday, March 30, 2015
Simple Windows 7 Keyboard Shortcuts
Today we are going to go through some of the coolest Windows keyboard shortcuts that you may or may not have ever known about. I know some of you are mouse clickers, but you can increase your productivity if you learn just a few quick keyboard shortcuts.
The Easy Ones
To practice these, open a Google Doc or Word Doc and type something. Then use the following keyboard shortcuts. I use these all the time to save myself time. (Consider not practicing the Print shortcut until you actually have something that you NEED to print.)
The Easy Ones
To practice these, open a Google Doc or Word Doc and type something. Then use the following keyboard shortcuts. I use these all the time to save myself time. (Consider not practicing the Print shortcut until you actually have something that you NEED to print.)
- Copy an item you have selected: Ctrl + C
- Cut an item you have selected: Ctrl + X
- Paste an item you have copied or cut: Ctrl + V
- Undo an action: Ctrl + Z
- Redo the last thing that I just undid: Ctrl + Y
- Select everything: Ctrl + A
- Print: Ctrl + P
Wednesday, March 11, 2015
Converting Files for Google Drive
So, you have all your files created in Word, PowerPoint and Excel, right? Are you aware that you can take your existing documents (or some of your existing documents) and upload them to Google Drive? Better yet, did you know that you can take your existing Office documents and convert for use IN Google Drive? That's a subtle distinction but you can actually do both. You can upload your current MS Office documents (Word, PowerPoint, and Excel) and just house them in your Drive...OR... you can CONVERT your existing MS Office documents to Google Docs, Sheets, and Slides then share them out or open them from anywhere.
So, you will learn the following:
So, you will learn the following:
- Turn on and off the new Drive.
- Setting your uploads to convert documents automatically.
- Upload your existing non-Google documents to your Google Drive.
- Convert your existing non-Google documents to Google Doc.
Tuesday, March 3, 2015
Multiple Users in Google Chrome
Many people have more than one Gmail account. Perhaps you have struggled with trying to use multiple accounts in your Chrome Browser. I myself have simplified the process by having two browsers open at any one given time...I use Chrome for my work email (ScottUsher@hartlandschools.us) and I use Firefox for my personal email (susher@gmail.com).
The problem is that Firefox doesn't seem to work quite as well as does Chrome when it comes to Google accounts, which makes sense since the Chrome Browser is a Google product.
The good news is there is a basic feature of Chrome that will make your Google life much easier.
We will:
The problem is that Firefox doesn't seem to work quite as well as does Chrome when it comes to Google accounts, which makes sense since the Chrome Browser is a Google product.
The good news is there is a basic feature of Chrome that will make your Google life much easier.
We will:
- Learn how to verify you are actually logged into the Chrome Browser.
- Learn how to verify your version of the Chrome Browser is up to date.
- Learn how to add a user to the Chrome Browser.
- Learn how to easily switch users.
Wednesday, February 18, 2015
Make Your Email Sparkle with a Signature
Do your emails have a signature at the bottom? If not, they can and it's really easy (and fun) to do! Follow along and in 5 minutes you can have your very own email signature sprucing up your email.
- Open your email and click on the settings cog on the right.

Tuesday, February 10, 2015
GMAIL: Setting Filters for Email
GMAIL puts all your email into one giant container and then uses filters and labels to gather what you are looking for based upon your criteria. It's all about searching with Google and thus it's all about searching in GMAIL. When you create a filter, you are asking GMAIL to do a pre-defined search based upon your criteria and then display the results.
What can you do with Filters?
- Forward mail to a different account
- Organize mail using labels and tabs
- Delete mail
Here's how to create a filter:
GMAIL Labels
Google email works differently than your traditional email systems. It is based around the concept of searching (which makes sense since Google is really good at searching). GMAIL uses labels to help us categorize things in our searching. Lets learn a little more about the GMAIL inbox (Part 1) and how to do work with labels (Part 2).
Part 1 - More About the GMAIL Inbox
Lets understand more about how the GMAIL inbox works: Google puts all your email in one large container. Every piece of email is stored in the container called "All Mail". To see the "All Mail" container, simply click on the "More" button (which becomes the "Less" button once you do click on it).
Subscribe to:
Comments (Atom)